Recurring Bookings
Here you will find step-by-step instructions on how to create a new recurring booking, how your customers create a new recurring booking, and how to make an existing booking a recurring booking/event.
Creating a New recurring booking
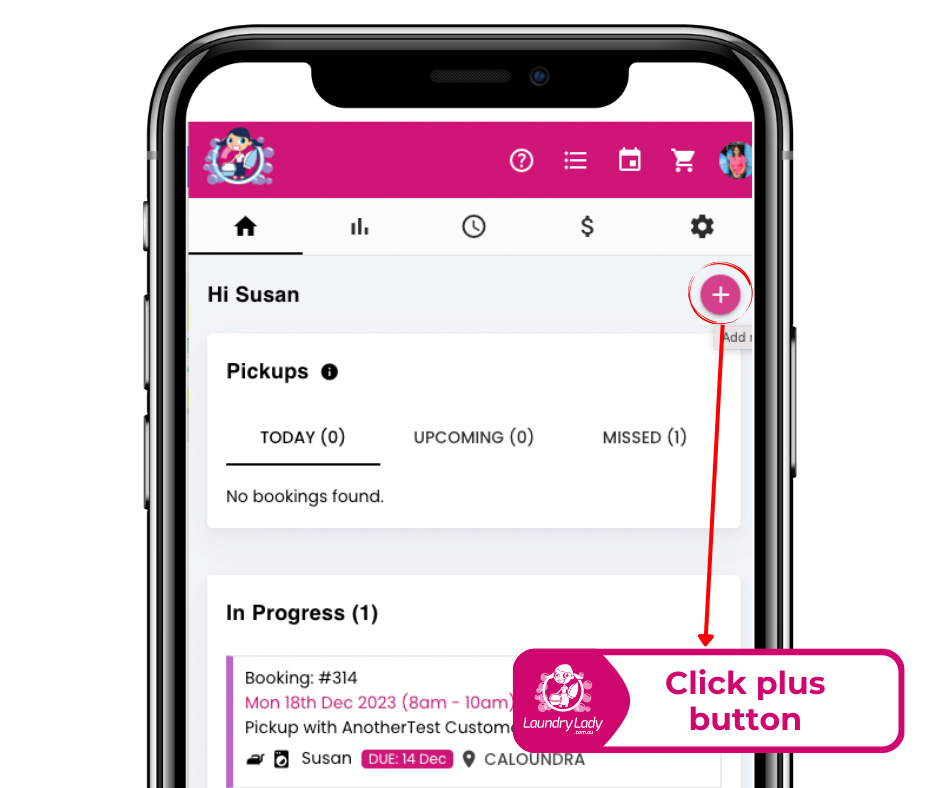
1. Click plus button to create a new booking.
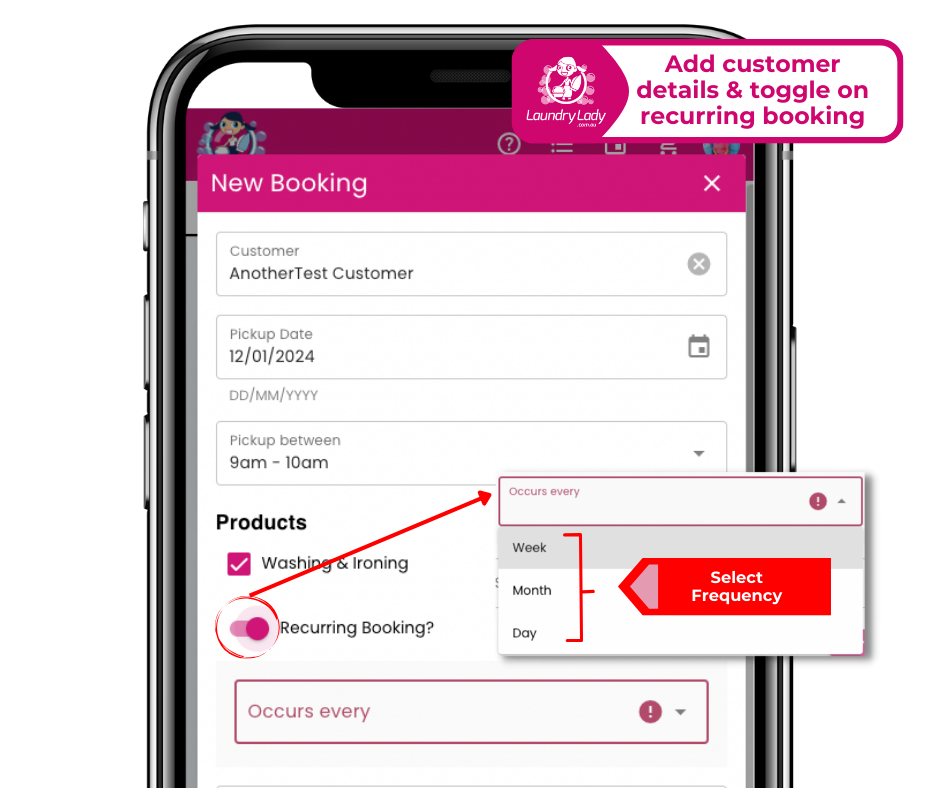
2. Add customer details for the booking/s.
Enter pickup date, pickup between hours, select products, then toggle on 'Recurring Booking' option.
Select frequency i.e: Week, month, day
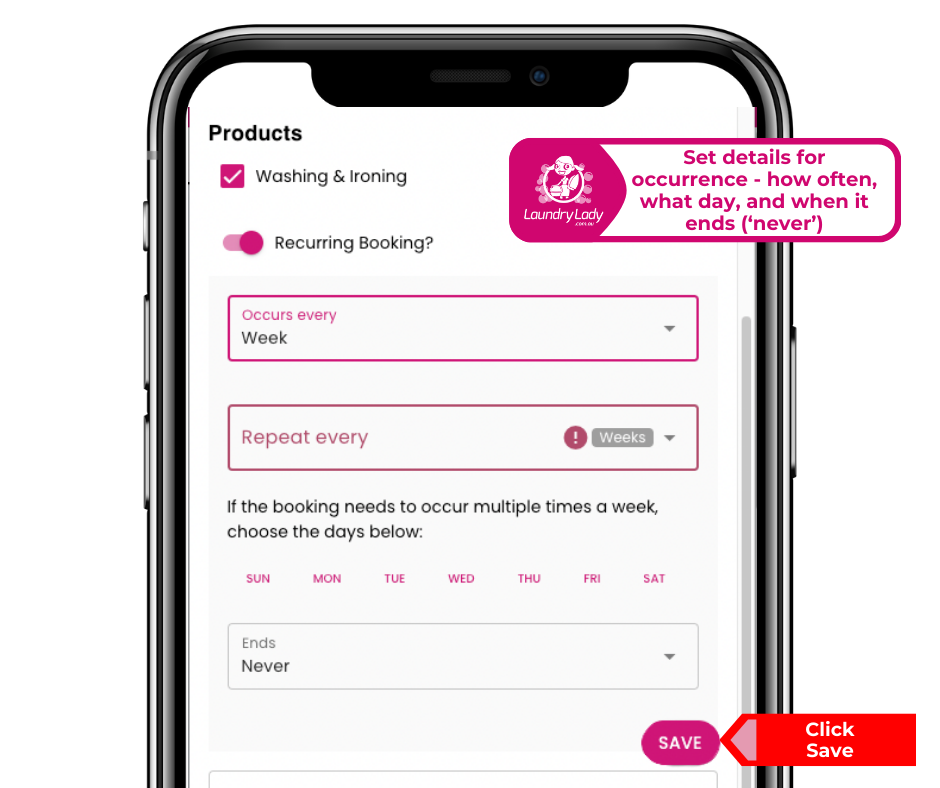
3. Choose which day. If the booking is for multiple days per week, click each required day.
Select when the recurrence ends - i.e 'never' (if an ongoing booking).
Recurring bookings: created by customers
When customers book online, they will have an option to create a recurring booking, which can be weekly, fortnightly or other, according to their needs.
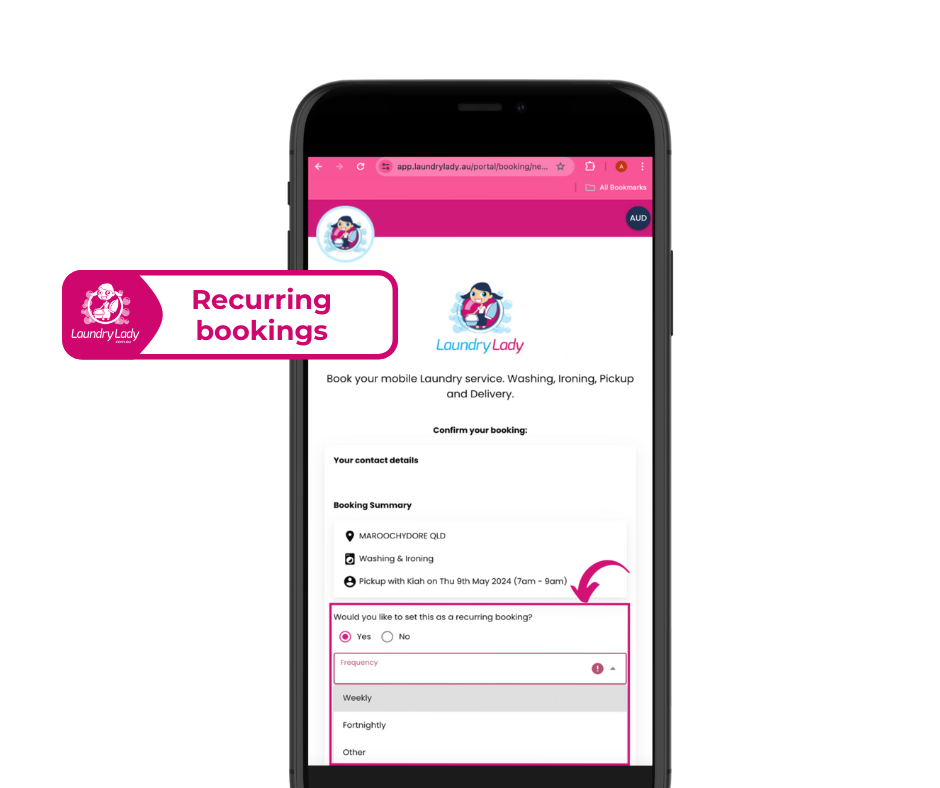
When the customers select the option “Other”, they will be able to add notes about the frequency they require. You will receive the notes in the “Booking confirmed” email.
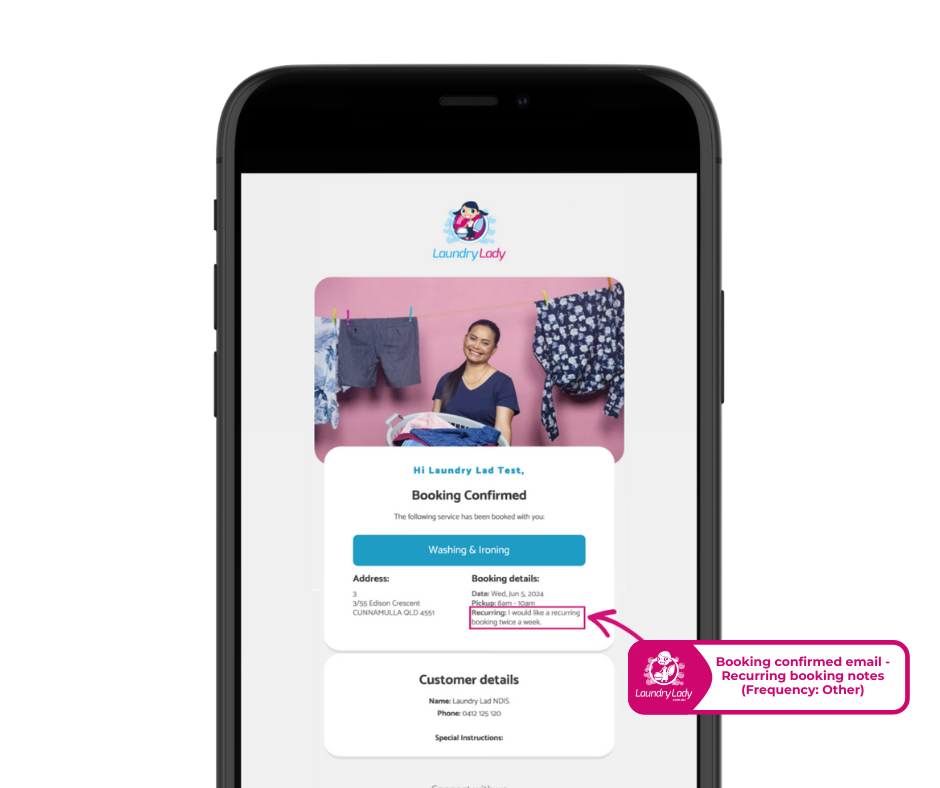
Important: Make sure that you check when the bookings with recurring booking notes come through, so you can edit them in the booking app accordingly. If you’re not sure about your customer needs, contact them and update what’s been requested.
Update an existing booking to recurring
If your customer advises you they would like a recurring booking, you can easily update the existing booking.
1. Click into the existing booking and toggle on 'Recurring Booking'.
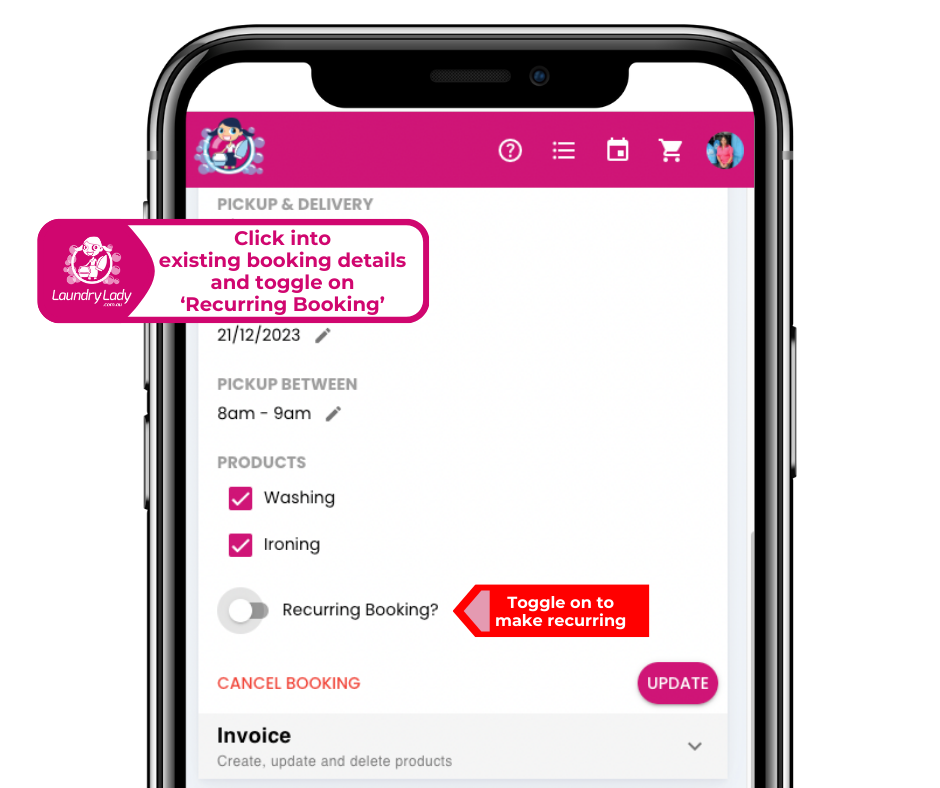
2. Select frequency for recurrence. Occurs every: Day, Week, Month.
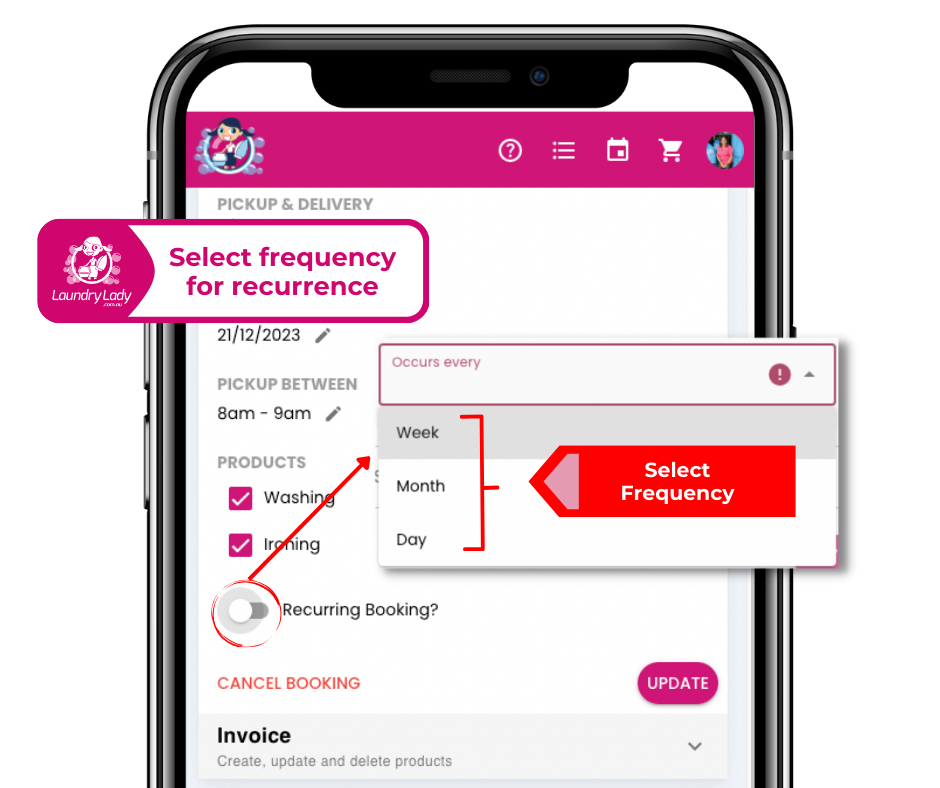
3. Select the frequency of the booking
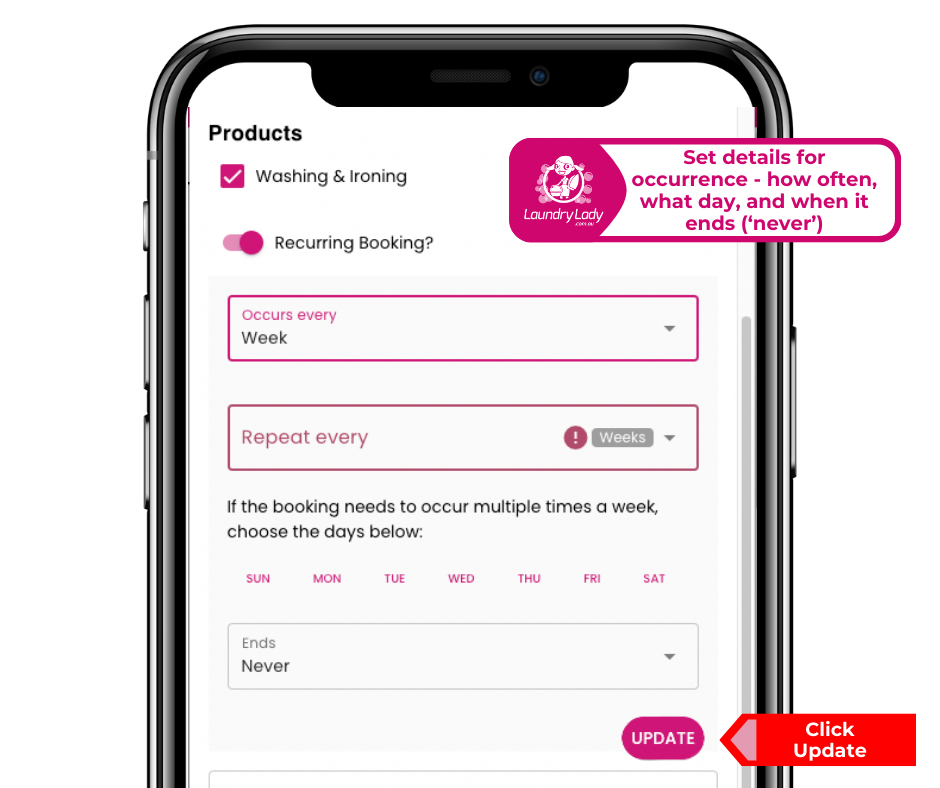
Choose which day for booking. If the booking is for multiple days per week, click each required day.
Select when the recurrence ends - i.e 'never' (if an ongoing booking).
View your recurring bookings
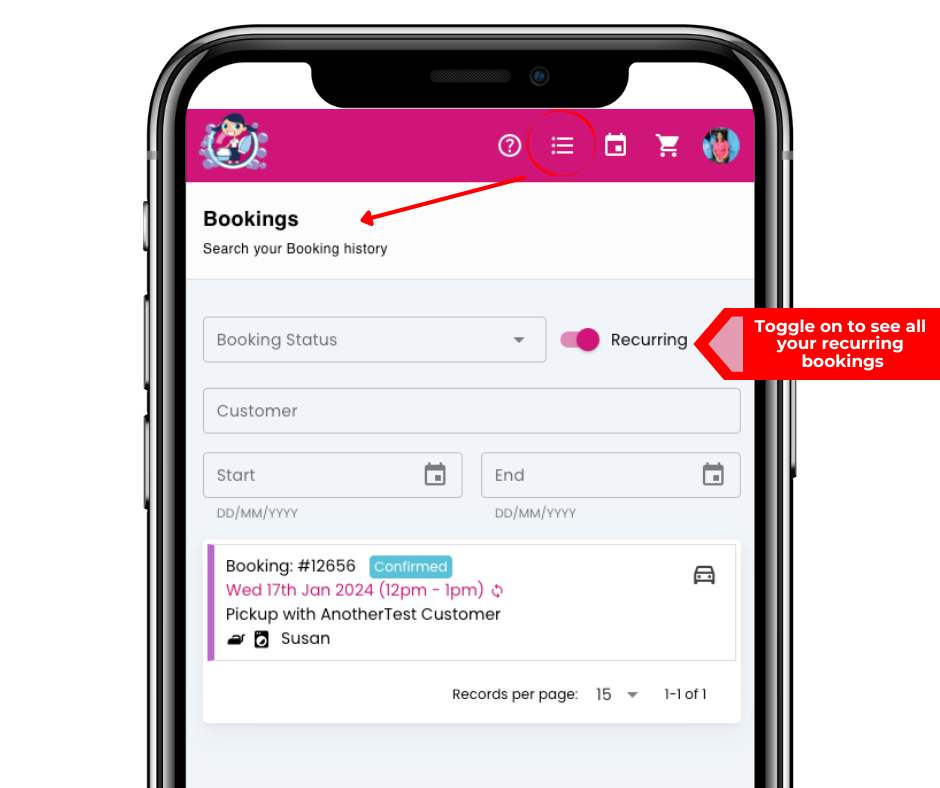
From List view, toggle across 'recurring' (beside booking status dropdown menu) to see a list of all your recurring bookings.
- Choosing a selection results in a full page refresh.
- Opens in a new window.
